
Golden hour photography is extremely popular for portrait and landscape photographers alike. After six years spent in the wedding photography business, I picked up a few tricks for capturing that perfect golden hour photo.
Although this post is primarily for DSLR users, you can implement most of the tips for mobile phone photography as well.
In addition, photographing portrait photography versus landscape photography consists of differing techniques and settings. I’ll compare and contrast the two and offer advice for creating the best portrait or landscape photo during golden hour.
Disclaimer: This post is in no way sponsored, we paid for all the activities mentioned and all opinions are our own. This page may contain affiliate links, which means I may earn a commission (at no extra charge to you) if you make a purchase after clicking my link. Thank you for being a loyal reader!
What is golden hour?

The short window after sunrise and before sunset is considered “golden hour”. The timing can fluctuate depending on the season. However, it’s generally assumed that golden hour is about 60 minutes after sunrise or before sunset.

Golden hour also blends together with the “blue hour”. This is when the light has nearly faded from the sky, producing more cool tones. Most importantly, the light casts a soft glow with natural enhancement of sunrise or sunset colors.
Why do I want to take photos during golden hour?

Photographing during golden hour will improve the lighting, color quality, and mood of your image.
The warm, soft light can be used to bring details to life when the subject is placed in the foreground. Or, the sun can bathe a landscape in richness when hitting the subject directly. The creative possibilities are unlimited during golden hour!
Furthermore, when shooting at golden hour for portrait photography, it gives your subject a flattering glow. Skin tones tend to be more natural and your subject won’t have harsh shadows on their face.
Golden Hour Camera Settings
Aperture
It’s best to use the widest aperture your lens can handle. Wide aperture means the lowest f/stop. For example, my widest aperture for my 50mm lens is f/1.4 and the narrowest aperture is f/16.
When you photograph at your widest aperture, you’re letting in as much light as possible to the sensor. Also, when capturing a portrait, shooting at a wide aperture gives you the ability to make your subject pop from the background. This is known as “bokeh“.
TIP: If shooting in manual mode intimidates you, try aperture priority mode instead when shooting at golden hour. The light is changing constantly and it’s one less aspect to juggle when trying to get your ideal shot.
When photographing landscapes, try playing around with a more narrow aperture. If shooting directly into the sun, you could even capture a “starburst” with a f/20 to f/22 aperture. You may have to lighten things up in post processing, but you’ll capture the sharpness of the sun’s rays.
Of course, every lens has different capabilities, so experiment with what your lens can do!
Shutter Speed
A general rule of thumb is to never let your shutter speed be “lower” than your aperture. For example, if you’re shooting with an aperture of f/2, you don’t want your shutter speed to be any slower than 1/200th of a second. If you do, you’ll risk your subject having “motion blur”. Or, the result will be a less than tack sharp image due to camera shake (if not using a tripod).
On the plus side, if you’re shooting in Aperture Priority mode, your shutter speed should automatically be correctly set.
However, in Manual mode, a faster shutter speed is always better for moving subjects, such as wildlife or portraiture.

In the photo above I photographed the horses at an angle to the setting sun, bathing them in golden hour light.
Also, my camera settings were f/2.8, 1/320th of a second, and ISO 400. As you can see, the horses are in focus. However, if you look closely at their legs and hooves, you’ll notice a slight motion blur. While I don’t feel this shot is a loss, it would have been even more sharp and clean. I should have increased my shutter speed and shot at a narrower aperture for a more correct image.
ISO
When the sun is lowest in the sky, you may need to increase your ISO by 800 to 1200. If you get too much higher, you’ll risk having an extremely grainy shot. I discuss more about grainy images in my golden hour photography tips below!
When the sun is highest in the sky, I would suggest starting around 200 to 400 ISO. Depending on how much light you’re letting in with a wider aperture, you could go as low as 100 ISO; thus, preserving as many details as possible.
It’s important to note that if you plan to shoot in low light situations often, a camera body with a higher end image sensor will give you the most flexibility. You’ll be able to climb past ISO 1200 without adding excessive noise to your image.
TIP: Shoot in RAW to correct noise and improve other features of your image in post processing.
Metering Mode
The metering mode determines what your camera thinks your aperture and shutter speed should be depending on your lighting situation.
For Nikon, metering modes include Matrix, Center Weighted, and Spot Metering. For Canon, metering modes include Evaluative, Center Weighted, Partial, and Spot Metering.
In golden hour lighting, play around with spot metering to ensure you’re getting the most evenly exposed image.
White Balance
Honestly, white balance is the only setting I leave on auto the majority of the time. Auto white balance is a fairly safe setting to leave in the hands of your camera. However if your colors seem too cool, try setting the white balance to cloudy or shade to maintain the golden tones.
Want a FREE Cheat Sheet for Golden Hour Camera Settings?
Click Here!
Best Gear for Golden Hour Photography
Portrait Photography Lenses
- A prime lens is ideal for achieving the widest aperture and sharp focus.
- Look for a lens with the widest aperture of 1.2 to 2.8
- 50mm (shown below) is a perfect portrait lens. Also, consider the 35mm, 85mm, and even a 70-200mm.
TIP: Research Sigma or Tamron brand lenses that may fit your camera body. They can be a cheaper alternative, yet equally impressive lens for portraiture. However, you may lose some advanced features like autofocus.


Landscape Photography Lenses
- A zoom lens is ideal for capturing various landscape compositions and wildlife photography.
- Don’t have to change the lens as often and can carry less gear/weight.
- Nikkor 14-24mm f/2.8 and Canon 16-35mm f/2.8 (shown below) are great wide angle lenses for landscape photography.
- Also, consider a 24-70mm and a 70-200mm lens. Additional telephoto lenses for wildlife include a 100-400mm, 120-300mm, and 500mm.


Lens Hood
- This one is kind of obvious, but rarely used.
- Most lenses come with a lens hood. Learn how to use it and what differences it makes in your images!
- Before purchasing, make sure the lens hood will fit your lens. The size is listed on the underside of the lens (i.e. Ø58).

Tripod/Monopod
- A solid tripod or monopod is a must for shooting in low light situations, including golden hour and blue hour.
- In addition, a tripod is essential for long exposure shots.
- To avoid camera shake when pressing the shutter button, try setting a short 2 second timer.
TIP: Look into a remote shutter release for your camera to reduce camera shake even more.


Reflector
- A reflector is a must for portrait photography.
- It helps to balance lighting on your subject and increase richness of color depending on the material you use.

Filters
- A polarizing filter will help reduce glare on reflective surfaces and improve clarity of distant objects.
- A neutral density filter acts kind of like sunglasses for your lens. By blocking incoming light, it allows you to keep your shutter open longer in order to capture motion such as running water without overexposing your photo.
- 3-stop (ND8) to 6-stop (ND64) neutral density filters are a great starting point.
- Similar to the lens hood, be sure to check the size of your lens (i.e. Ø58) before buying.


SD Card
- A faster SD card will always benefit you when your shooting quickly, such as for sports, dancing at weddings, or golden hour photography when the light is changing quickly.
- The more gigabytes (GB), the more photos you’ll be able to store on your SD card. This is imperative for those who shoot in RAW mode, which produces files roughly 5 times larger than JPEG.

Golden Hour Photography Tips
Research Location
When choosing a location for portrait photography, I always check to see when sunrise or sunset is. I also try to visit the location beforehand. Scouting where the sun falls will determine what backdrop I find most interesting for the shoot.
To have a clear idea of what time the sun will rise or set at your location, check out the apps below.
- Photo Ephemeris
- Golden Hour App (for iphone)
- Helios App (for iphone)
- Golden Hour App (for android)
- Blue Hour App (for android)
- Exsate Golden Hour App (for android)
If you can’t visit the location ahead of time, take a peek of satellite or street view on Google Maps. Although, this isn’t ideal, it’ll give you a better sense of what to expect.
Be Aware of the Weather
Not every golden hour photo shoot can turn out perfectly. Even if there is cloudy weather, never fear! The sun can still peek through clouds occasionally, giving the image a more dramatic, and sometimes more colorful, result.

TIP: If overcast conditions are expected, plan to arrive TWO hours before sunset. It tends to get darker quicker, therefore less light to work with when approaching the blue hour.
If you have extra time, it might be best to scrap the mission until the next day. Avoid equipment damage if there is a high chance of rain or extremely gusty winds at your location.
Get There Early
As noted above, getting to your location early is of upmost importance. The weather can change in a flash. It’s best to be prepared in case storm clouds do roll in and literally steal your thunder.
It’s also beneficial to prepare your equipment. Play with your settings and take test shots to feel confident in the look you’re hoping to achieve.
In addition, arriving early and staking claim to a spot gives you the flexibility to avoid crowds and make the most of your composition.
Experiment With Different Perspectives

Feel like your image is lackluster or not turning out how you envisioned? Sometimes, it’s refreshing to take the camera off the tripod and use other objects around you to stabilize the camera. It forces you to see things from different perspectives or frame the image in a way you didn’t notice before.
Try using a fencepost, rock, or even your own knee to position your camera and adjust the angle as necessary. You might surprise yourself with how well it turns out! For the portrait above, I squatted and used my knee to support my elbow. Thus, I captured the light filtering through her veil.
More Perspective Tips
- Look for reflections in water, glass, etc.
- Find angles to shoot from below and above your subject.
- Practice the rule of thirds to increase visual interest in your photos.
- Shoot through objects or use objects to frame your subject.
- Play around with alternating focal points in the same composition.
Subject Placement
9 times out of 10, I’m placing my subject in the foreground of my light source. This is also known as “shooting into the sun”. Backlighting can be a little tricky to ensure the subject is in focus. Try using a lens hood or shade the top of your lens with your hand to ensure a sharp, crisp subject.

Experiment even further by placing your subject at an angle to the light source to capture more dramatic contrast. The photo above is a prime example. The harsh shadows accentuate the angles of the rock and bring out the vivid, golden tones.
Don’t Stop Shooting
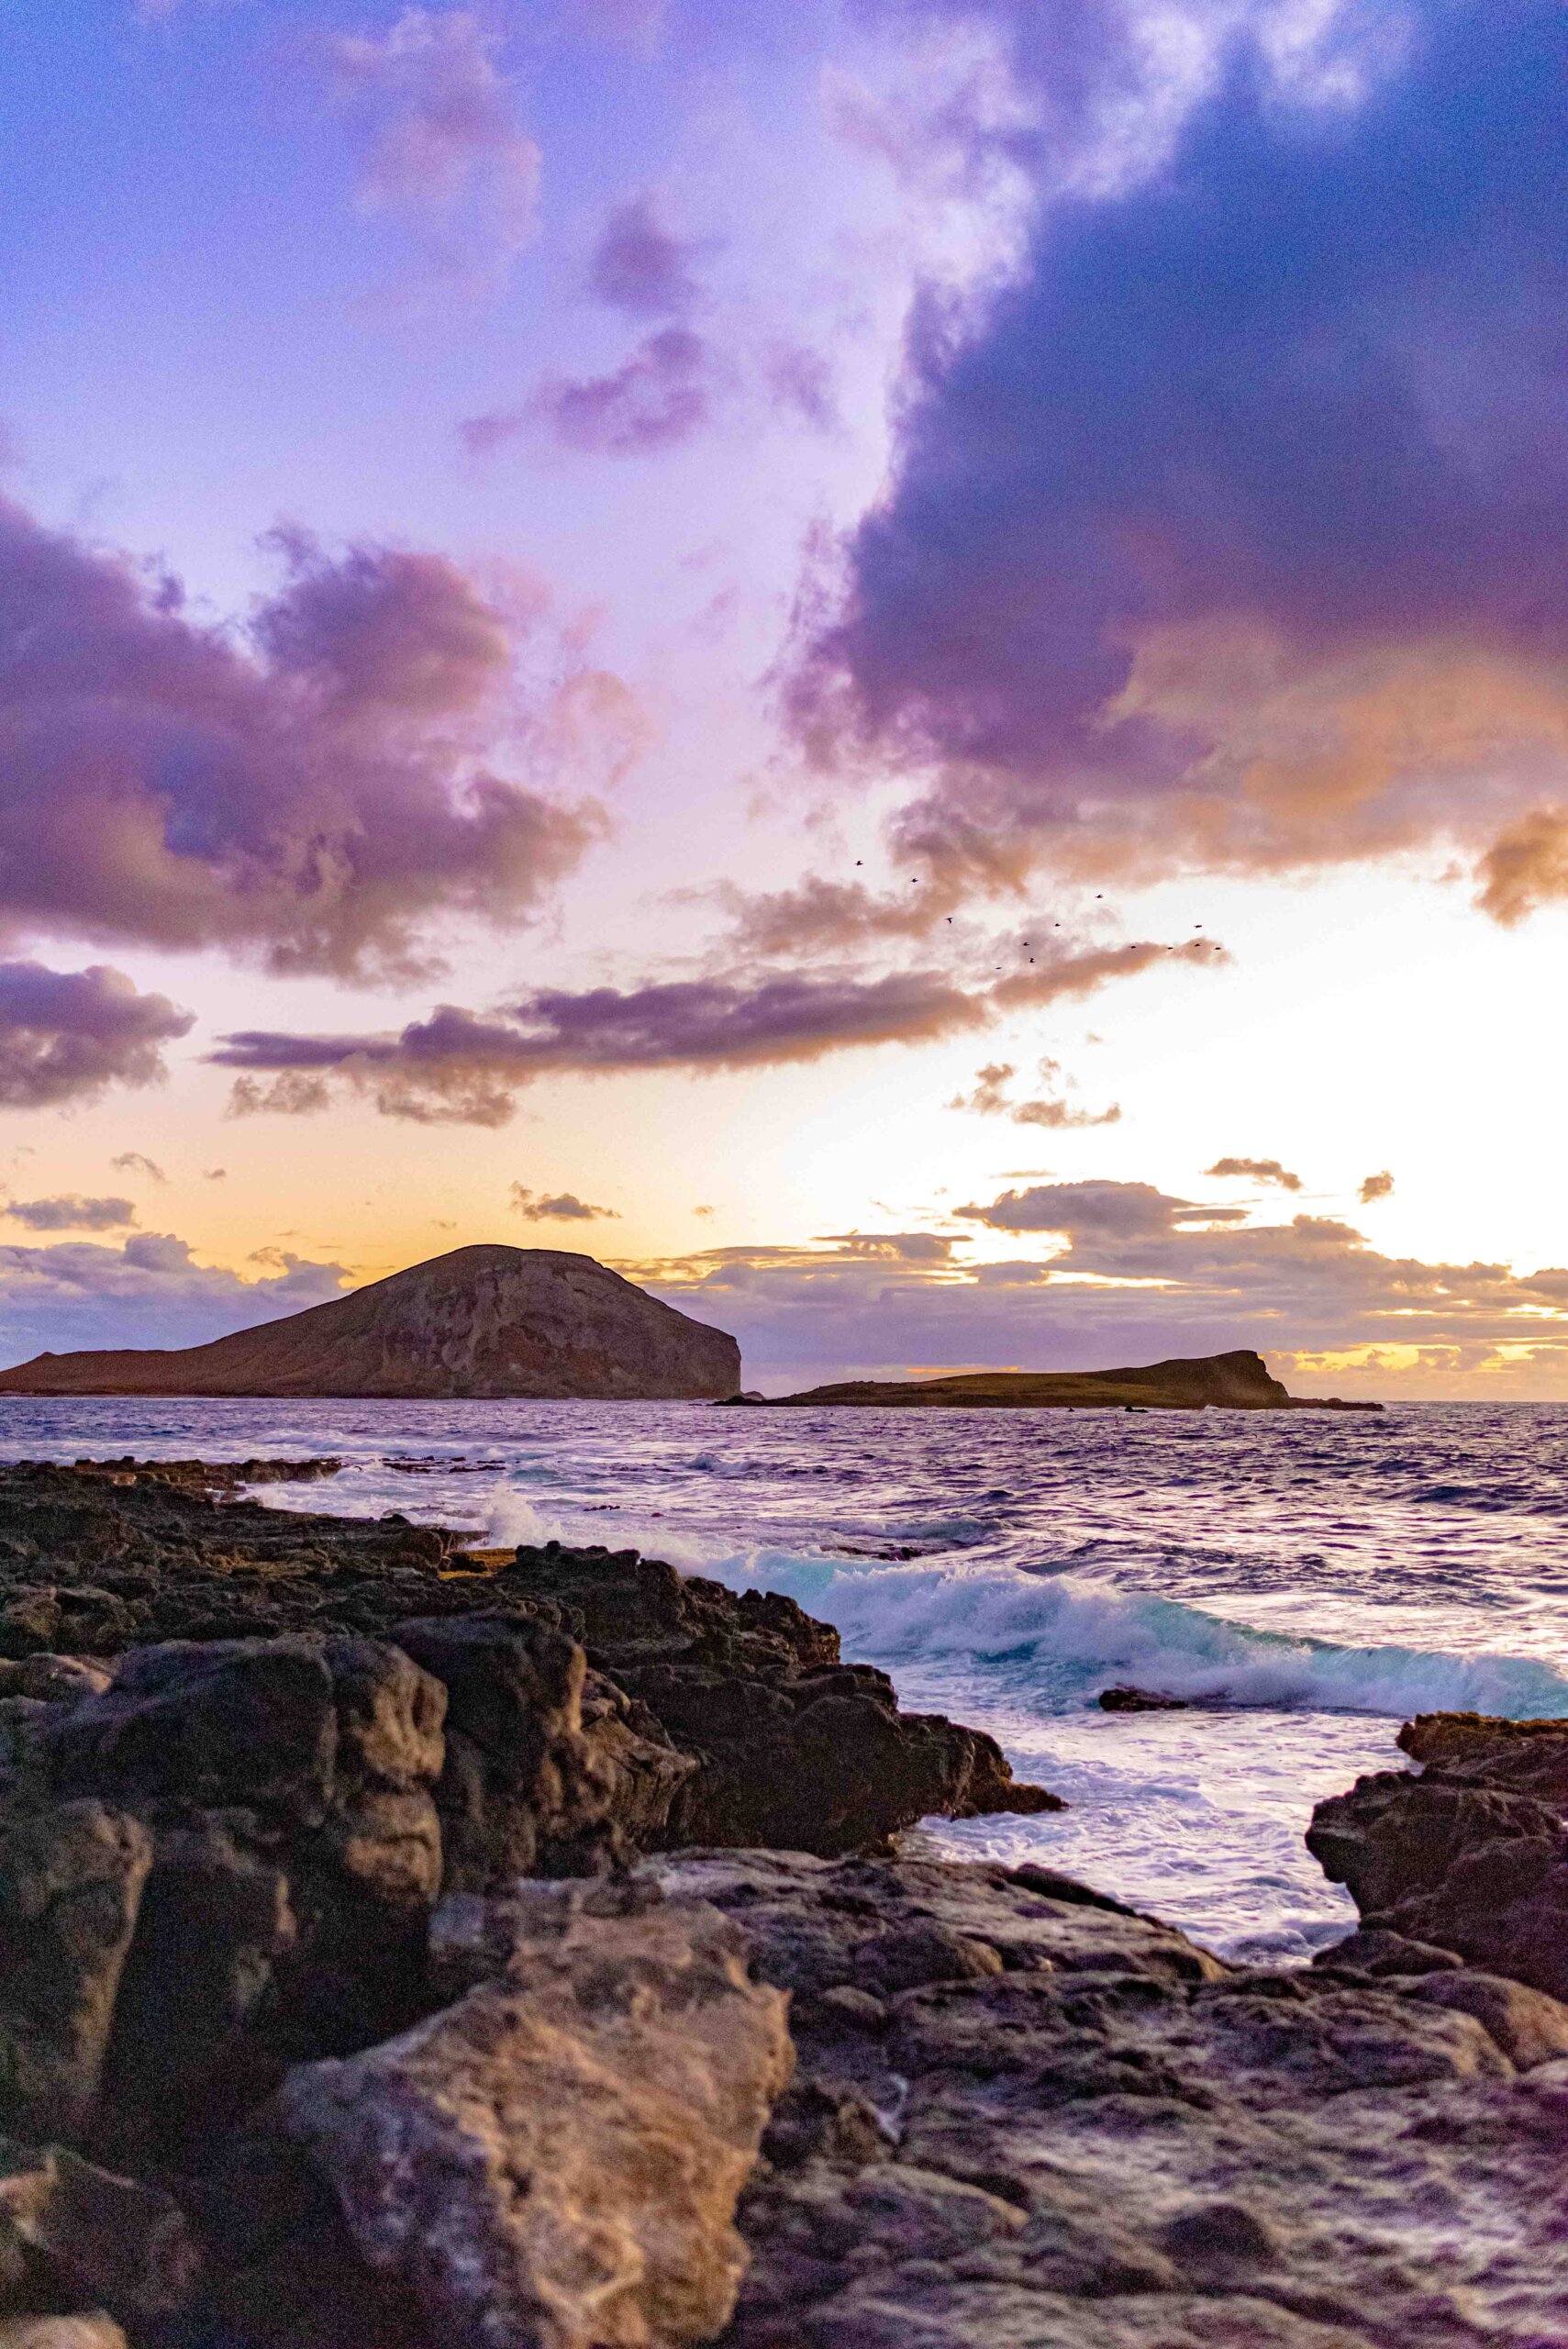
Blue Hour 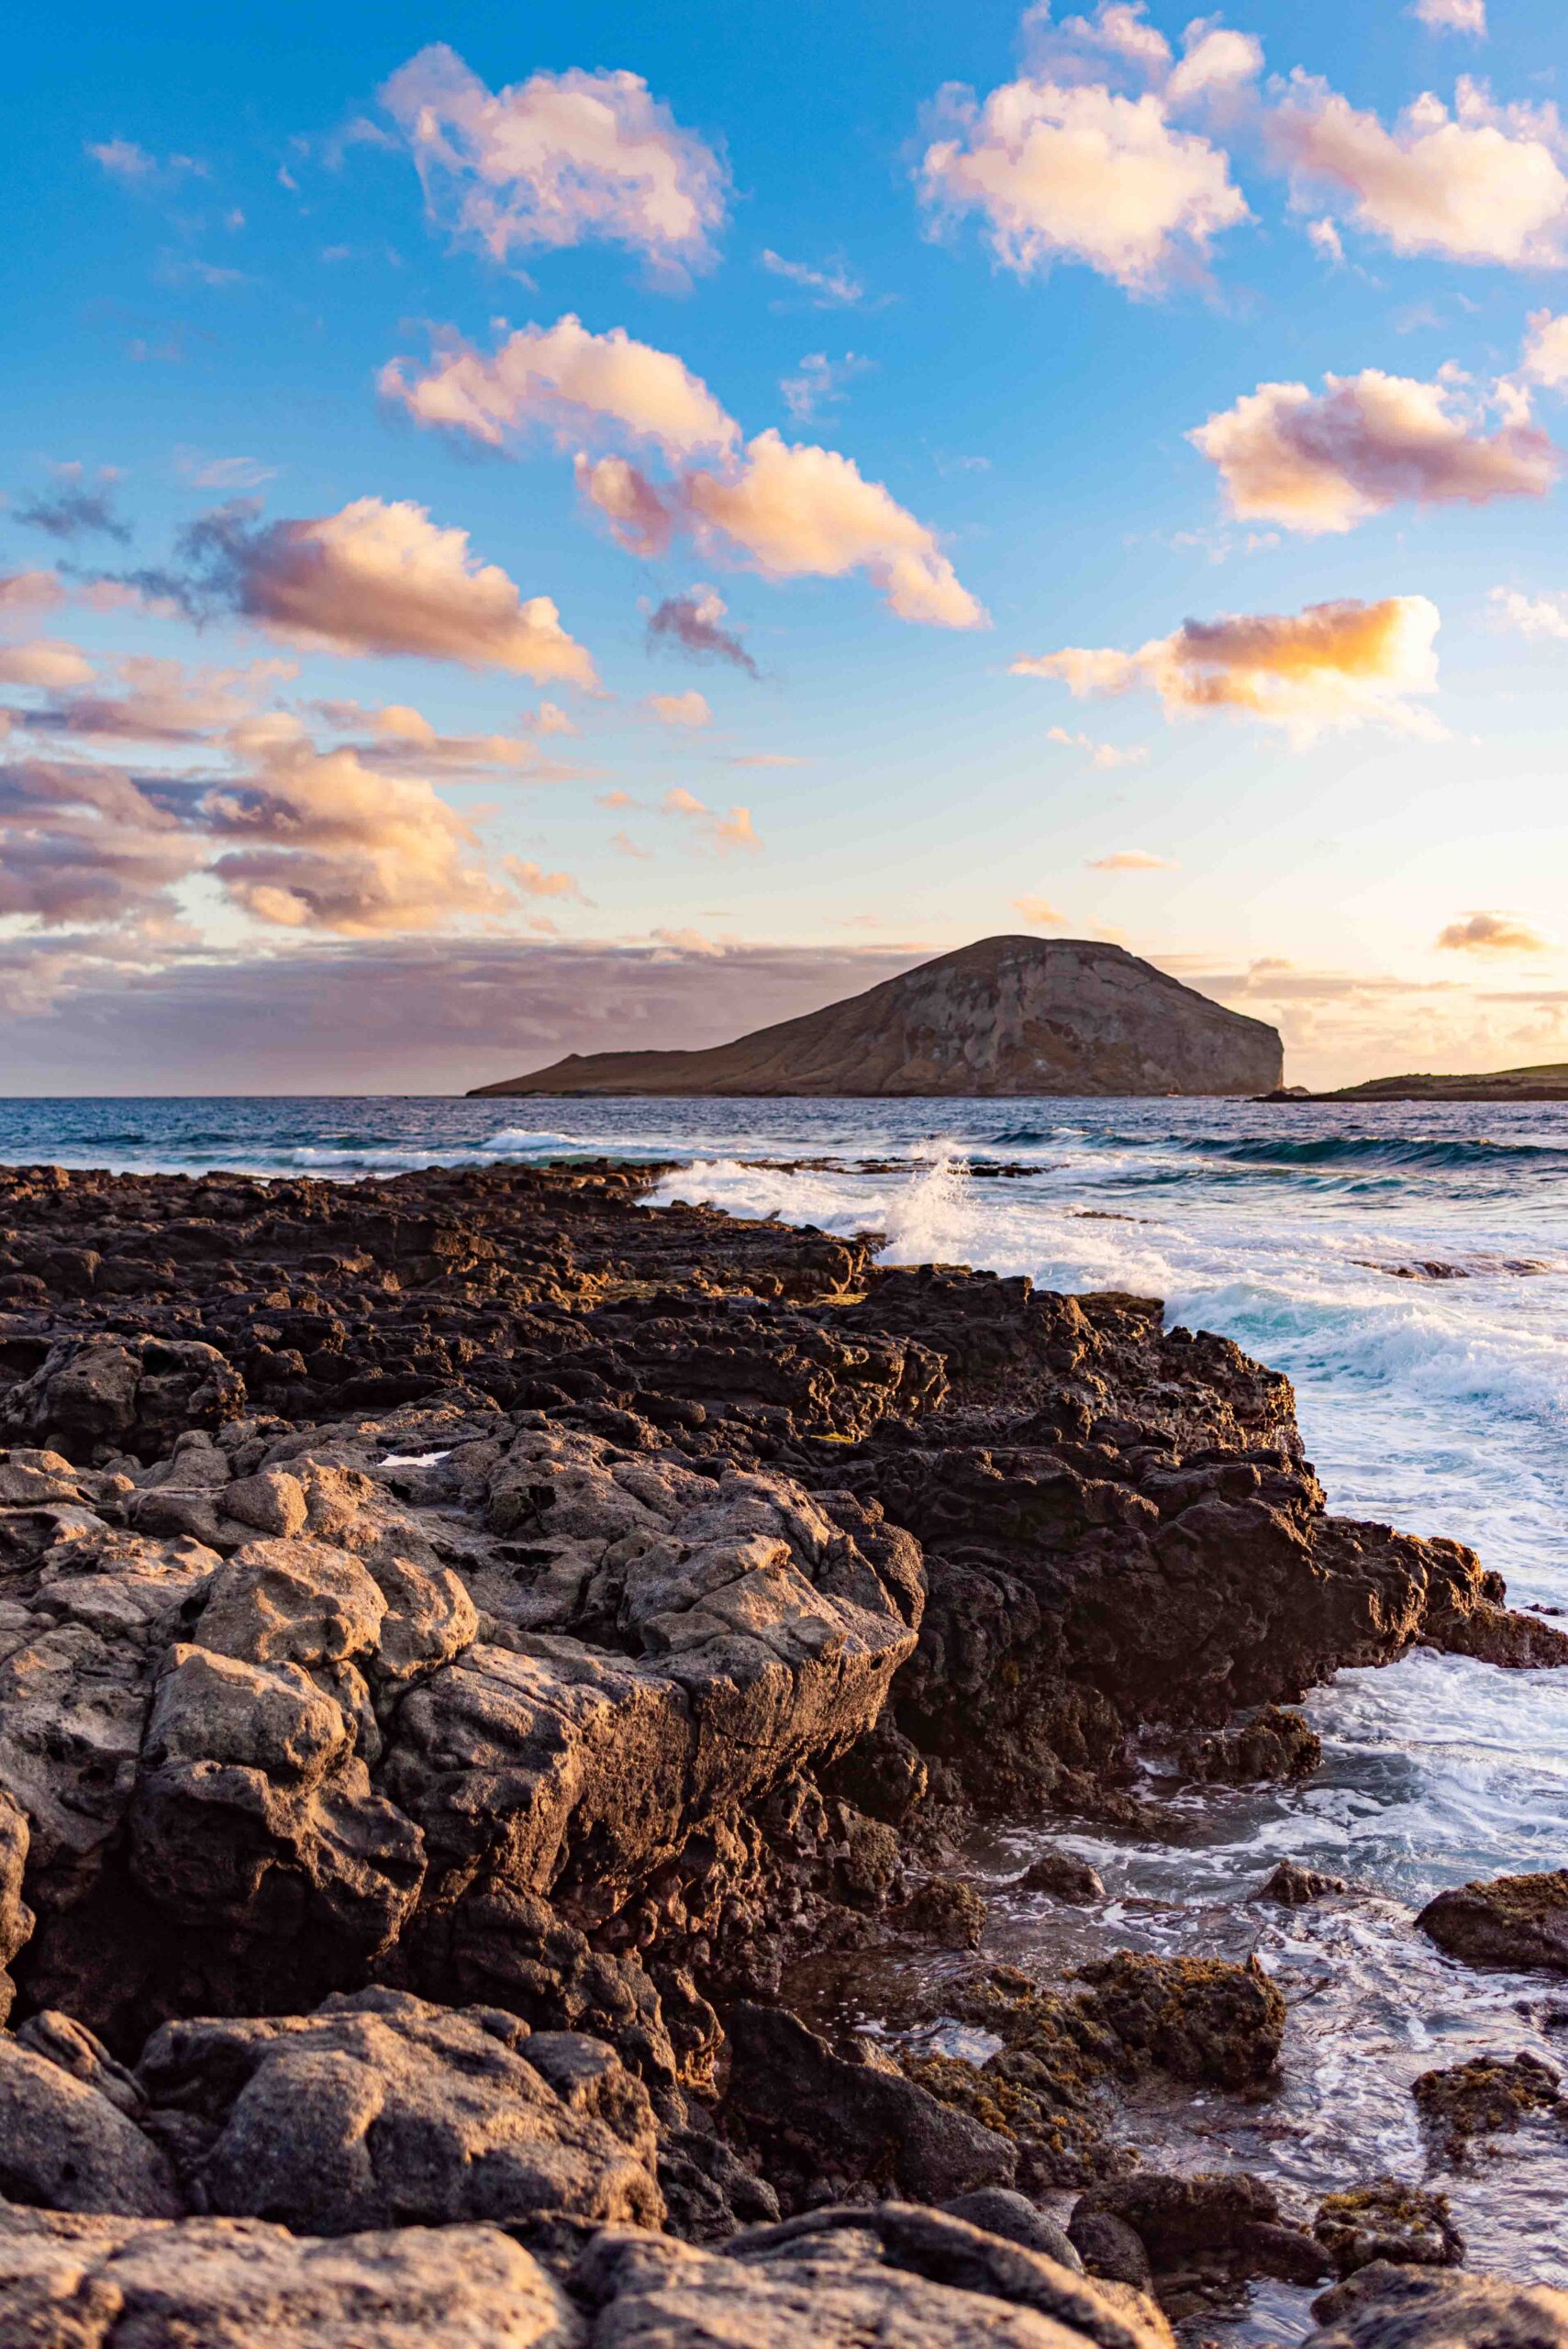
Golden Hour


The images above were taken within 20 minutes of each other. The first image, photographed during the blue hour, has much more cool tones. Furthermore, I focused on the sky because of the colors of the sunrise. The second image, photographed during golden hour, has warmer tones. The shoreline became the star of the photo because the shadows were highlighting the crevices of the rock formations.
This photo series demonstrates that the lighting can and will change while you’re shooting. The focal point or your shot will probably shift as well. Multiple compositions, subjects, and moods can be captured within a short time window. Therefore, stick around for magic that might present itself!
Don’t Be Afraid of Lens Flare


I feel like lens flare in photography has a bit of a bad rap. In the photographs above, the blueish/green light orbs or discolorations are lens flares.
In most photographs, a lens flare is considered a blemish. These colorful additions can be avoided by using a lens hood or shooting at a different angle to the rising/setting sun.
However, under certain circumstances (much like many artistic endeavors), if you understand the rules and know how your camera works, it’s okay to break them every now and then. Sometimes a lens flare can add character to a photo.
Grainy Images are Better Than Blurry Images

Although noise can be unsightly in a photograph, what’s worse than a grainy image is a blurry image. At risk of cranking your ISO higher to keep your shutter speed quick, a sharp subject will be your reward!
Others would even argue that grainy images, when composed correctly, can radiate stronger emotion, mood, and texture. It’s another one of those rules that when broken creatively can truly shine.
Use the Horizon as a Composition Guide

In landscape photography, using the horizon to compose your image is a smart way to go! Experiment during golden hour with capturing more sky in the viewfinder, then work on capturing more foreground in the viewfinder. Find out which composition best accentuates the focal point of your image.
Furthermore, use the horizon as a leveling tool. Even if your image isn’t perfectly straight, the post processing will be much more seamless with a balanced horizon line.
Look For Movement

As with any type of photography, movement creates interest and emotion in an image! Apply this technique during golden hour by focusing on wispy hair of a subject, traveling wildlife, flowing water, or the way light filters through folds of rippling fabric.
The movement adds complexity and character to the image. In addition, you can capture the lighting and color of the moving subject in a way that contributes to the overall emotion of the photograph.
Focus on Details

My favorite subject to photograph during golden hour is details, hands down. I’m mesmerized by the way the light highlights the tiniest of features on a blade of grass, how a strand of hair swirls in the breeze, how the colors become bolder on trees and you can trace their veins to the tip of each leaf.
When focusing on details in photography, you’ll use the light, perspective, and composition to make an otherwise ordinary object look like one of the most important subjects in the world.
Do you have any other tips or tricks for photographing during the golden hour? Share them below in my comments! I always love to learn more and improve my skills!
Shop my travel portfolio and purchase my photography here!
Did you enjoy this read? Please share and pin for later!
 |
 |


